Share
Pin
Tweet
Send
Share
Send
To make the product look beautiful and neat, due attention should be paid to the details. Slices of the neck or armhole can be “cleaned up” by turning or oblique inlay.
The concept of "clean grind" includes a number of operations:- Fold the two parts with the front sides, grind slices, cut the seam allowances close to the stitch.
- Unscrew the parts so that the allowances are between two layers of fabric.
- Sweep out the edges with a seam roll to the inside / back side. Iron it. If desired, the neck can be stitched according to the model.
- We process sections of the neck / armhole of a finished or cut oblique tie with a width of 4 cm, folded in half. A slanting inlay can be cut out from the lining or the main fabric. If in view of the lack of fabric there is not enough length of the oblique inlay, then the ends of the oblique inlay should be cut at an angle of 45 degrees, grind, iron the seam. Further use as a single.
- Fold the oblique trim in half along the wrong side inward. Iron, giving the oblique hem the shape of a rounded neckline / armhole.
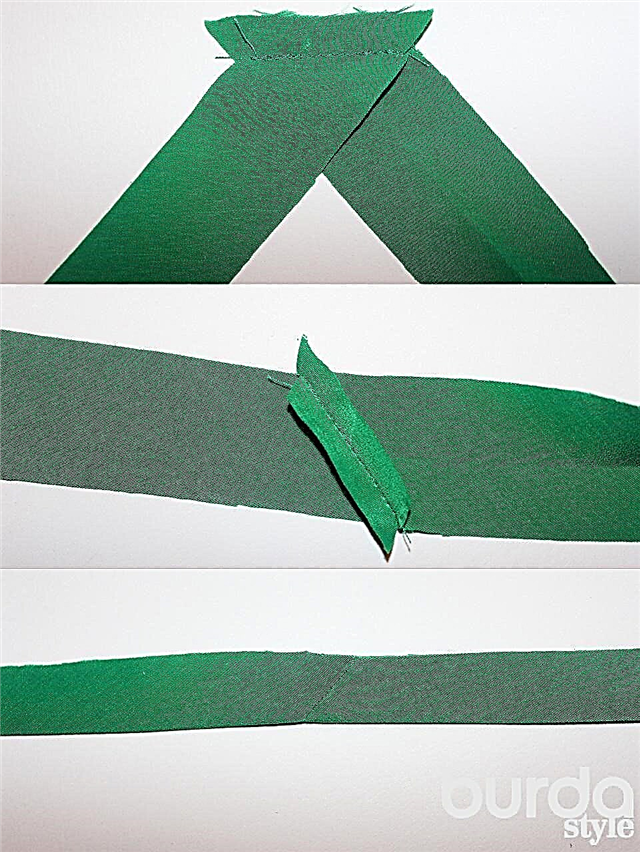


- Pin the slanting inlay to the neck / armhole section with the front side to the front side so that the bend of the neckline lies 1.5 cm from the marked seam line and the open sections of the neckline lie on the allowance.


- Stitch the hem on the wrong side of the front and back exactly along the marked seam line. Cut off the seam allowances close to the seam, cut in the rounding sections. Unscrew the oblique trim flat.With bulk material, you can stitch / oblique inlay to the allowances next to the seam. Unscrew the bias tape on the wrong side, sweep, iron.
- Optionally, along the neck you can lay the finishing stitch at a distance of 5 mm (or according to the model) or fasten the oblique trim / hem with hand-held, unbuttoned stitches from the wrong side.
Share
Pin
Tweet
Send
Share
Send