When the word “edging” is mentioned in the context of textile finishing, a set-in edging usually comes to mind - a narrow oblique strip of matter bent along in half, often with a cord laid inside.
Such edging is sewn between parts along the edge of the product or placed in the seams that they want to highlight, for example, in reliefs, in the seams of the stitching of coquets, etc. This is one of the oldest methods of decoration.
How to make edging with the zipper foot
The scope of the edging is wide: in men's, women's and children's clothes of casual and elegant assortment, in uniform, including military, all kinds of accessories, as well as when creating textile products for the interior. The popularity of Kant in clothing has again become relevant in recent years.
Sew a pajama blouse
One of the technical features of this finish is the thickening of the edges of the product and the seams into which the edging is set. This is not always desirable. If you need to highlight the edges of the product with a contrasting edge and at the same time maintain the fineness of processing and plasticity, you can use another technique that I will introduce you to in this workshop.

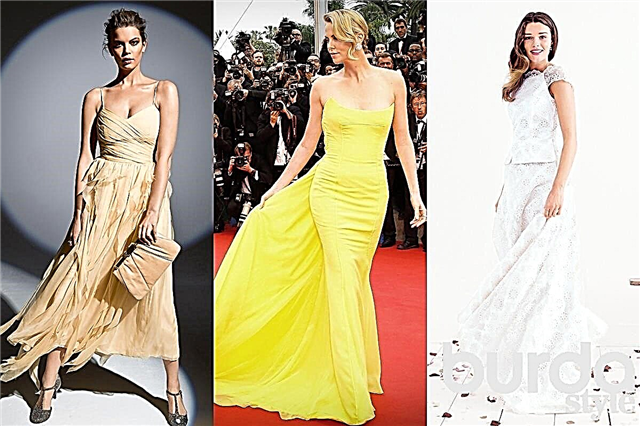
Dress decorated with contrasting hem on the sides, turndown collar and cuffs.
The techniques discussed here can be used in the treatment of round-neck turn-down collars, necks, sides and cuffs of any shoulder products (dresses, cardigans, pajama-style blouses, etc.).
- Special offer

- 1
- 2
- 3
- 4
- Special offer

- 1
- 2
- 3
- 4
- Special offer
- 1
- 2
- 3
- 4
- Special offer

- 1
- 2
- 3
- 4
The master class was prepared on the example of model 113 from Burda 9/2012:
- Special offer
- 1
- 2
- 3
- 4
In the first part of the master class, the processing of dress sides with a contrast transition edging will be considered.
Step 1

Tuck in the trim fabric trim 0.6–0.7 cm longer than the fastener, taking into account the allowances. We need this difference for sweeping the edging. Round the upper corner of the board.

Duplicate the details of the kits with an adhesive pad. Duplicate the allowance for the fastener on the shelves of the dress.
Step 2

Make markings along the line of half-carried shelves with manual basting stitches.

Place the pick on the shelves with the sides facing inward, chop with pins, forming a slight slack on the pick details.

Throw a boarding aboard, fitting the boarding in the upper, rounded corner.
Step 3

Iron the landing to a width of 1.0-1.5 cm from the side cut. In this case, the iron must be operated with light pressure, rearranging from place to place, so as not to stretch the side of the bead.

A side cut with a tight fit on the plot of the marked seam of the side turning.
Step 4

Grind the board from the mark on the collar to the bottom of the fastener. The width of the weld seam 0.7−1.0 cm

Remove the basting, iron the seam on the rib to a width of 1.5 from the side cut.


Iron the side turning allowances.
Step 5

Carve allowances up to the mark of embroider collar: on the details of the pick-ups - up to 0.2-0.3 cm, on the details of the shelves - up to 0.6-0.7 cm.

Notch the allowance at the site of the collar stitching mark, not reaching the seam of turning the bead by 0.1 cm. In the places of fillet curvature, notch allowances are made, not reaching the line by 0.1 cm.

Turn sides to front. Sweep the edging out of the details by slanting stitches.

Width of edging 0.2 cm in finished form. Iron.
Step 6

Stitch the coquette details to the back and shelves. Turn out and iron.

If you wish, lay the finishing line on the details of the yoke at 0.1-0.2 cm from the seam.
Step 7

Trim the edge of the collar along the outer edge and cross sections.

Tighten the edging line. Put a notch on the right shelf in the place of the inflection of the fit, noting the width of the edging.

Unscrew the right side on the front side of the shelf. Align the lower sections of the fastener, focusing on the notch of the edging width. Start the lower side angle only on the right shelf to the line mark of the half-drift (middle seam). Notch allowances at an angle, not reaching the line by 0.1 cm.

Turn the corner and iron.
Step 8

Fold the shelves with their faces inward. Level the upper corners and edges of the sides, the middle sections of the shelves. Sweep and grind the middle seam of the shelves to the bottom edge of the fastener with a seam width of 1.0 cm.

Overcast the middle seam of the shelves, grabbing the corner of the bead.

Iron the middle seam on the right shelf.

View of the fastener of the shelf on the front side.
It will be possible to start laying the finishing stitch along the side and fastening the bottom of the fastener after processing the collar and stitching it in the neck of the dress. These operations will be discussed in the second part of the master class.
Continuation in the second and third parts of the master class:
Contrast dress dress with contrast transition piping
Processing cuffs of sleeves of a dress with a contrast transitional edging
The author of the master class and photo: Elena Lenkova

Lena has a higher and special education - a tailor of outerwear for men, women and children.
In clothes, he appreciates the individuality and thoughtfulness of the image, the originality of the cut. He likes to analyze modeling techniques and product processing technology. Leads his page on Instagram. Many people know Lena as a longtime user of the BurdaStyle.ru website.
"The quality of processing and the interior decoration of the product are integral aspects of sewing."
Material prepared by Julia Dekanova